
To follow up on our post a few weeks ago on how to make a spring bouquet, we’re sharing DIY steps to making a boutonierre. You can surprise your groom on the day of with one that you made, or if you have any upcoming black tie events this could be an easy accessory for your date!
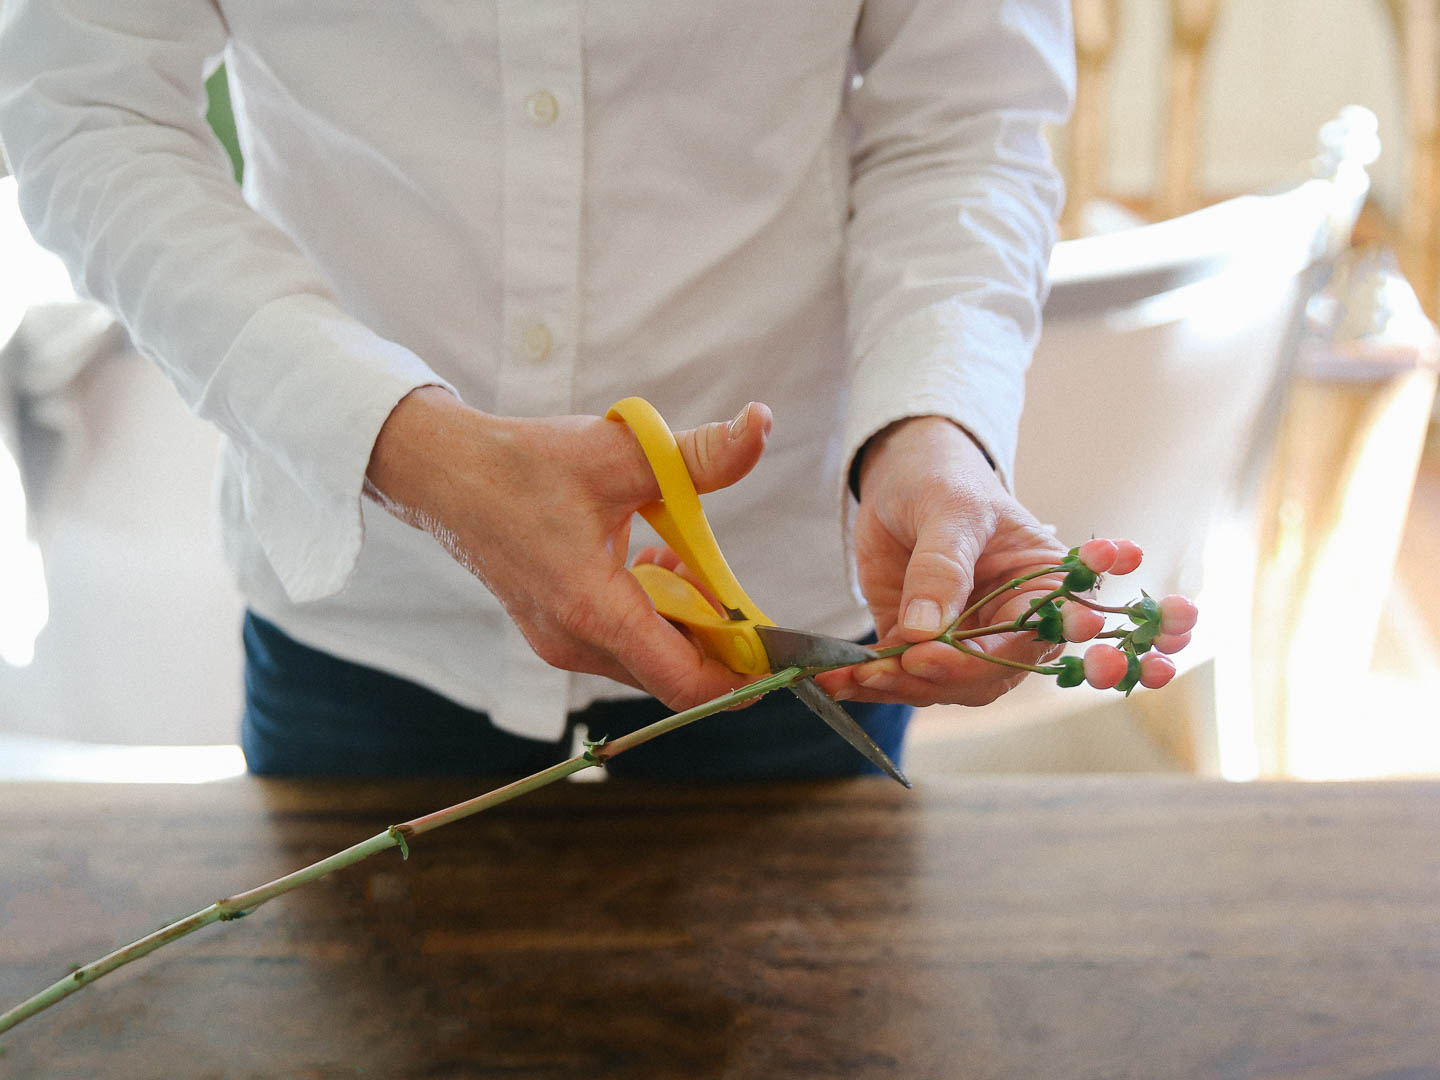
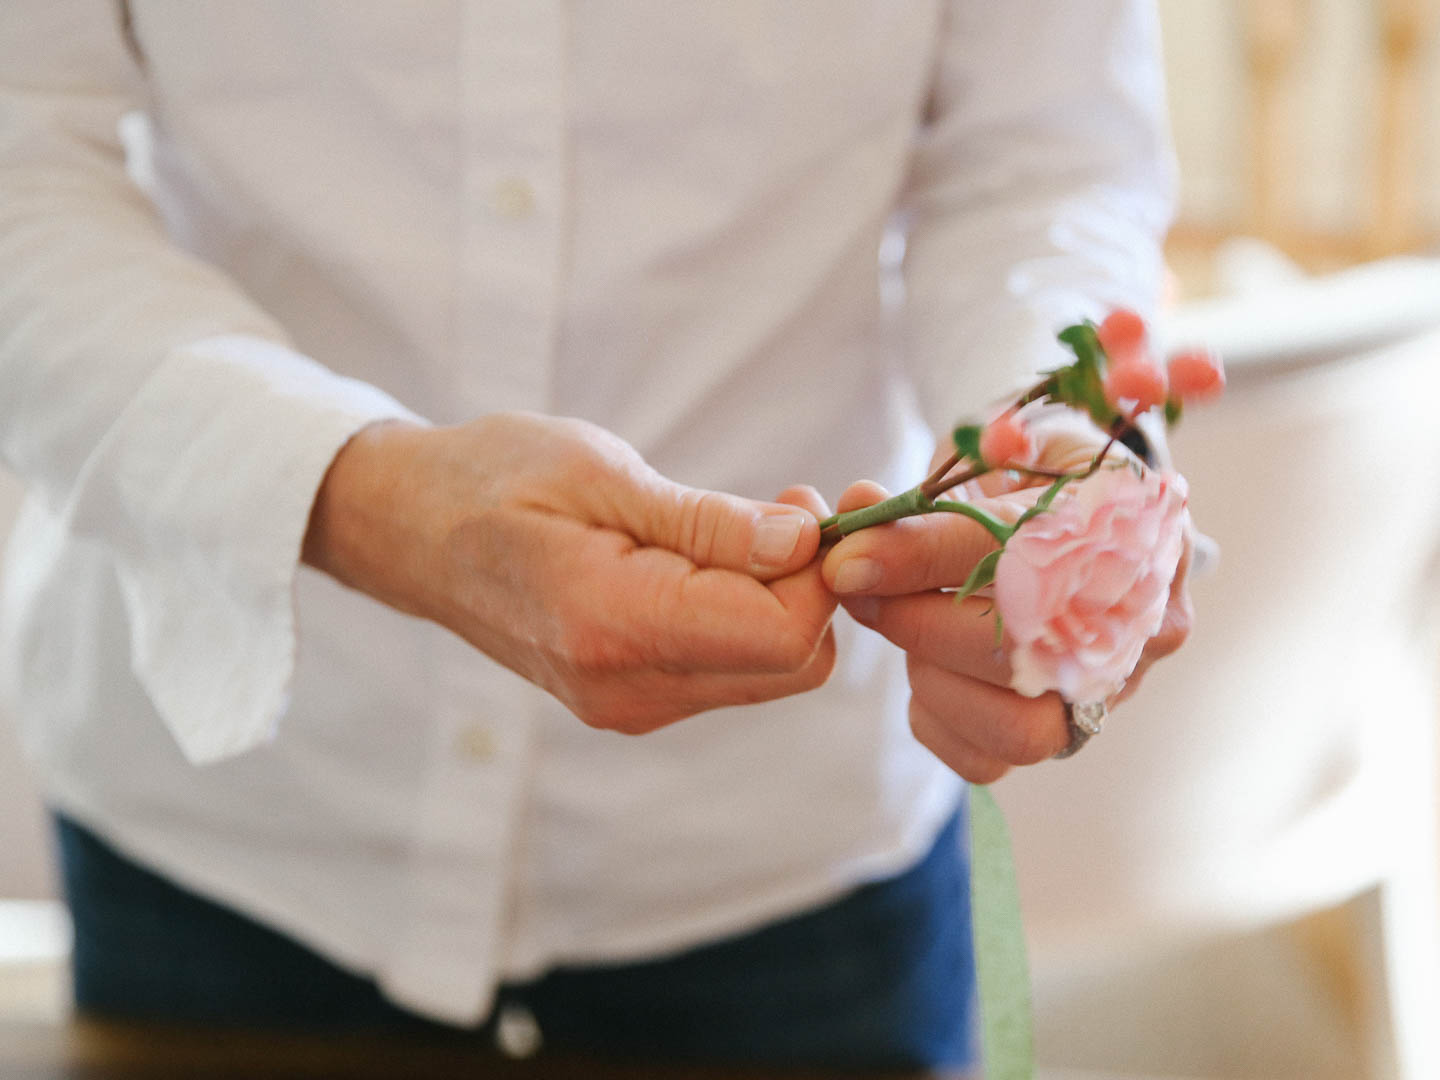
First, trim the stems of the flower you are going to use. I like to pair a couple of things together to give it some texture, or if you want to use a single flower, a peony bud, calla lily, or interesting solitary bloom work best. Here, we’re using a tea rose and hypericum berries. Thank you to Lucy Cuneo for the lovely images.
After you trim the stems, wrap with sticky stem wrap tape (available at your craft or floral supply store). Be sure to stretch it a little when you start to activate the stickiness.
Wrap it almost all the way from the top to the bottom. I do leave a bit of the natural stems (with evenly cut ends) showing at the bottom so that you don’t see the green stem tape.
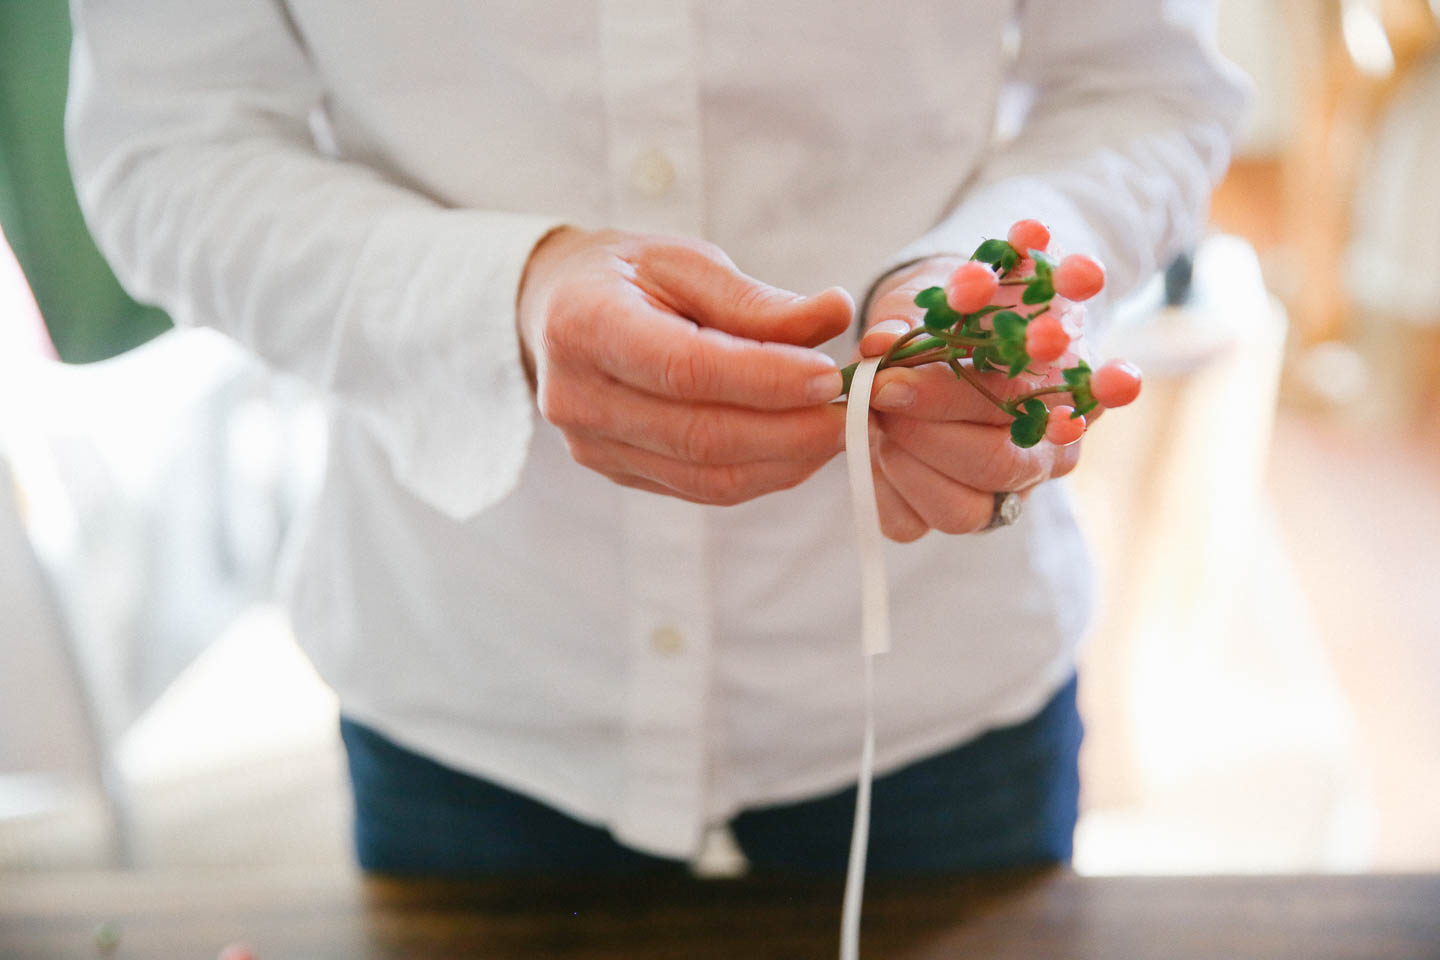
To cover the green stem tape, we’re going to use a thin width satin ribbon- leave about 3-4 inches of a tail end at the top and wrap to the bottom.
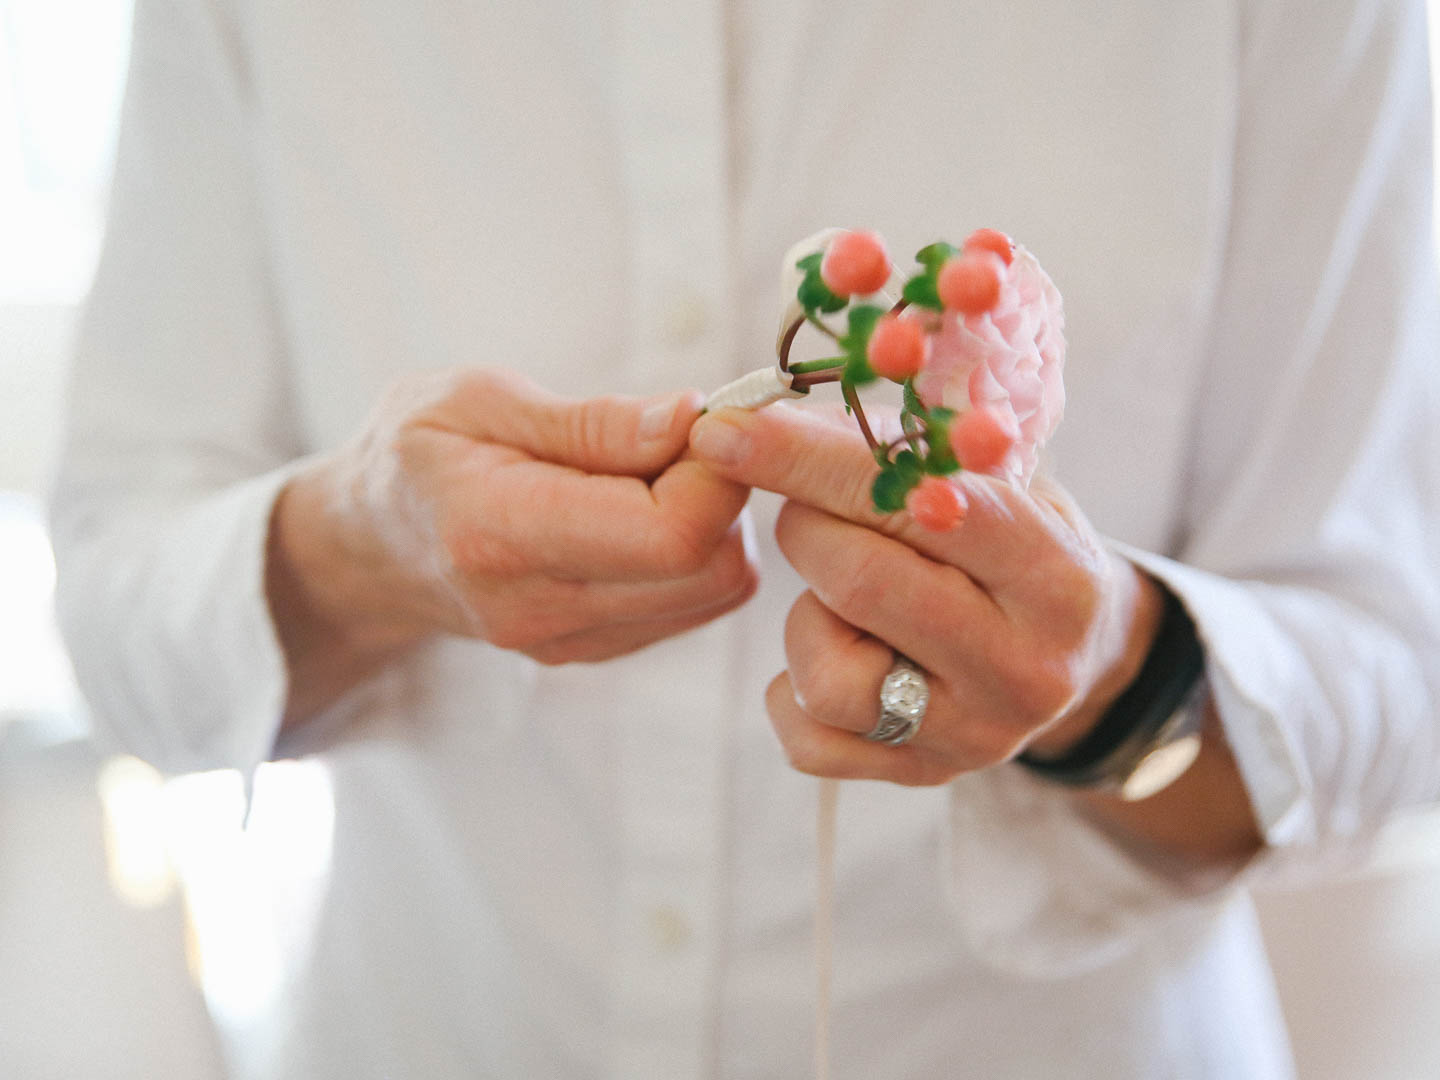
We wrap tightly from the top to the bottom (I find it’s easiest to spin the wrapped flowers in my hand) and then come back up again opposite side from bottom to top.
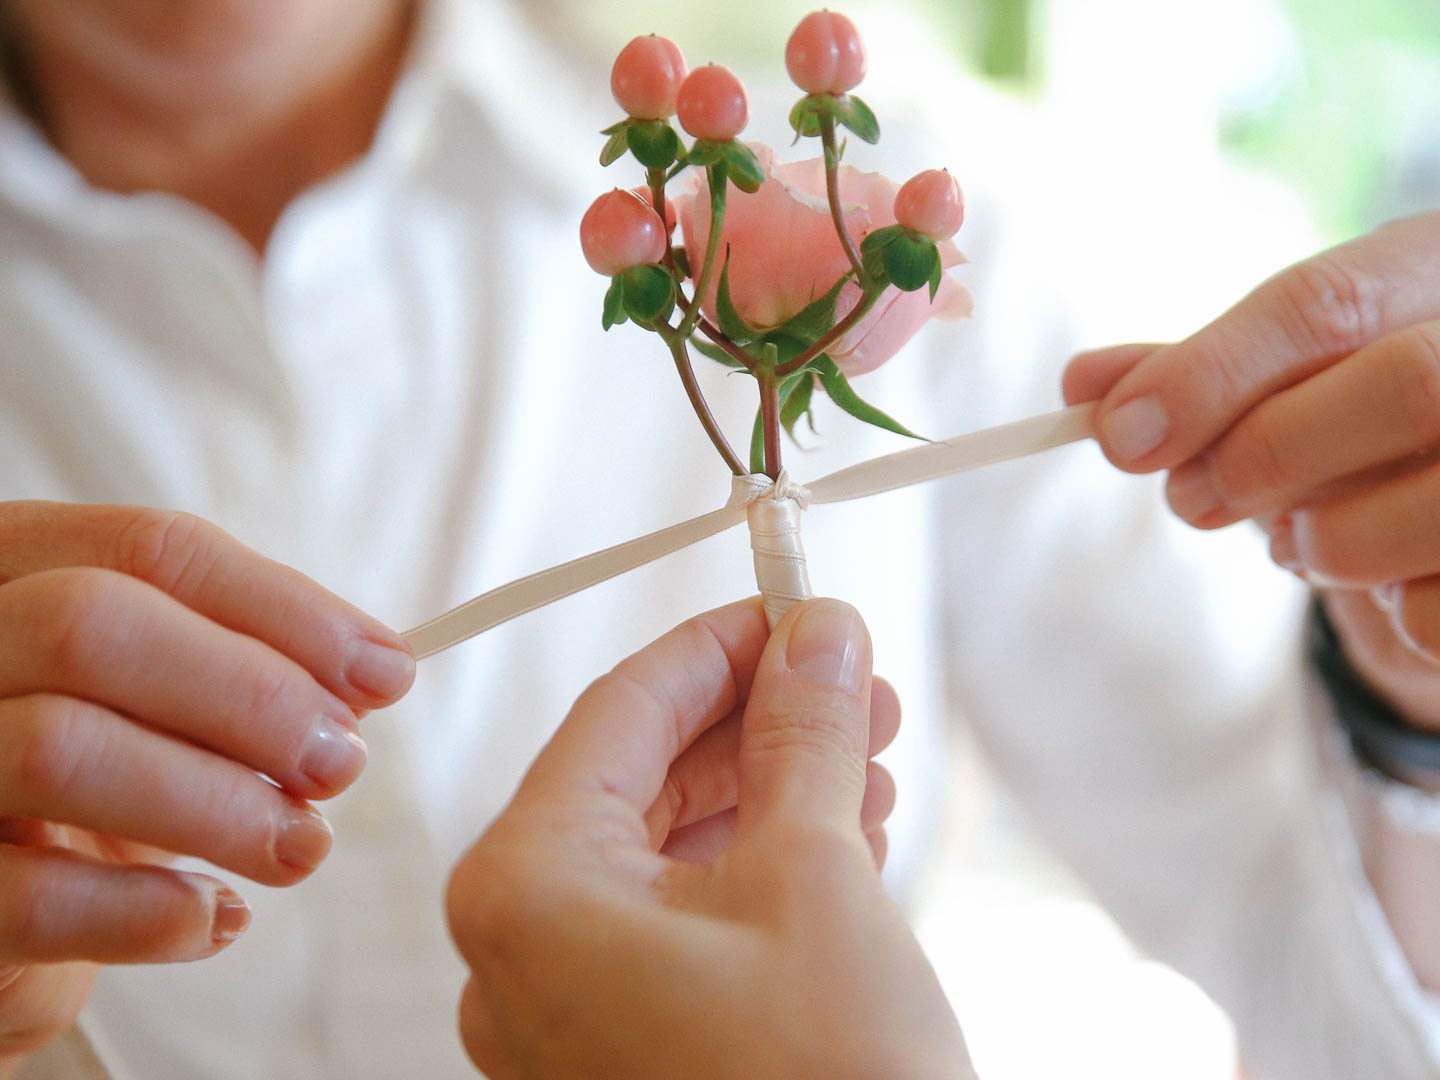
If you have a friend or another set of hands nearby it may be easiest to ask them to hold the flowers for you, so that you can tie your knot at the top. I like a good square knot where the ends are about even on both sides.
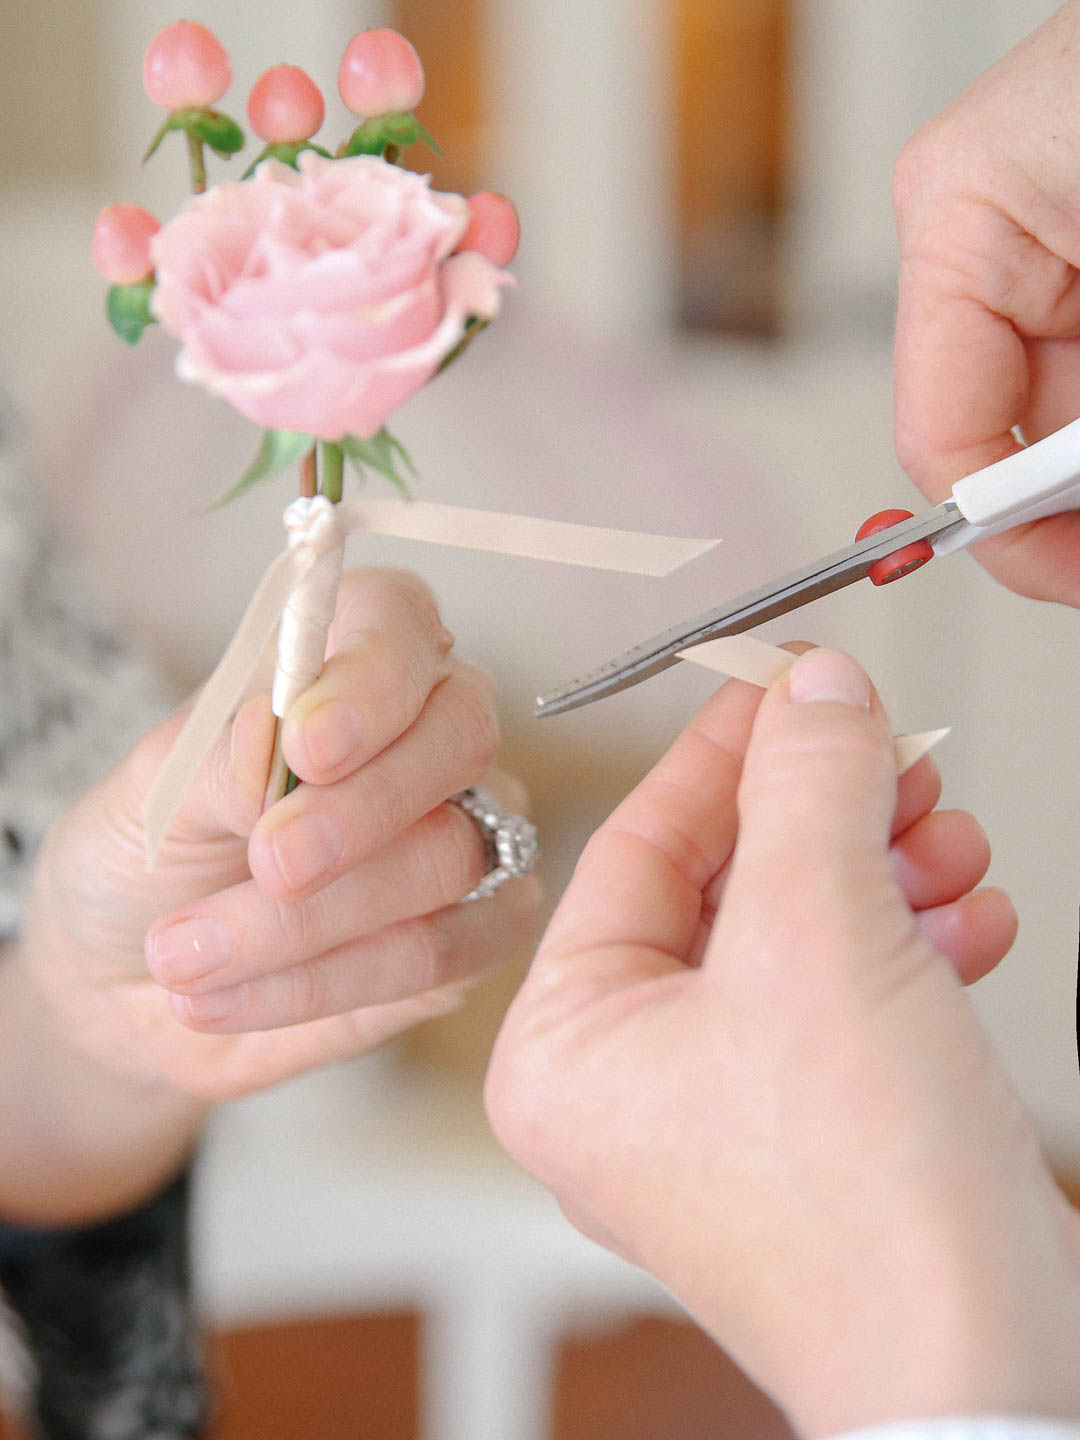
I like the look of trimming the ends on an angle for a finished polished look. I also use the straight pins w/ the smaller pearl tops. I stick them in the flowers angled down in line with the stems, so they are handy and ready to pin on the lapel.

photo by Liz Banfield